With Halloween right around the corner, it’s a good time to spend some creative and spooky hours with your kids while making this Fun Frankenstein Paper Craft!
Frankenstein is a quintessential Halloween monster and crafting a Halloween Frankenstein Craft For Kids that jumps and bobs seems like a best way to make way for ghoulish season.
This cute DIY Jumping Frankenstein Craft would be perfect for adding some spooky magic to your kid’s Halloween decorations.
This Frankenstein craft idea for kids is really clever and doubles up as a fun DIY Halloween toy that your kids can make!
Easy DIY Jumping Frankenstein Craft
We’re going to make Jumping Frankenstein craft with paper.
This Halloween origami craft does need quite a few step, but definitely worth the effort. Once you understand how to make the box, the rest is quite simple.
Don’t worry, it’s not as difficult as it may sound! But before you get started, here is a Funny Frankenstein Joke to tickle your bones.
Supplies for Frankenstein Paper Craft
- Green origami sheet (Preferably in two different color shades)
- Black and white sheet
- Glue stick
- Scissors
- Marker or pen
How to Make the Jumping Frankenstein Craft Step by Step:
The moving Frankenstein craft requires four steps and each step is easy, just be keen on the instructions.
- Creating two open-mouth cubes. One of 20cm*20cm and the other of 18*18cm. We’ll guide you on how to make one!
- Creating a paper spring that will make your Frankenstein jump!
Step 1: Make the Cube Box of 20cm x 20cm
Time needed: 20 minutes
- Start with a green square (20cm x 20cm) paper.
- Fold the paper in half from both sides and unfold. You should have a “+” crease on the sheet by now.
- Take each corner (vertexes) to the center of the “+” sign and crease them diligently. Don’t unfold this step.
- Now, the next step can be a little difficult to understand. I’m going to simplify that for you!
Divide the square into three equal parts (6.6cm x 20cm each). Fold the first crease upwards and the third face downwards. Press on it firmly.
- The three new creases should be horizontal to you when you unfold the last step.
- Now, repeat the fourth step, but this time, on another adjacent edge.
Then, unfold the last step again.
- Open two vertical triangle doors completely, it will create a hexagonal shape.
- Fold the hexagon’s bottom edge inside and the top edge overlapping the bottom edge.
- Unfold to get your back to the bigger hexagon. Your hexagon will have nine mini-square creases by now! (Not counting squares on the triangle part)
- Let’s call the parallel edge’s corners “edge-V” for reference.
Take any one “edge-V” and fold it inside until it’s touching the paper beneath. You will notice a mini square and a diagonal line there. Use the diagonal crease to split and (outward) fold the square in two triangles in such a way that the triangles overlap each other. Do the same with the parallel “edge V.”
- Once done, you will have a flap shape as the end result on that side. Fold the flap shape inside. One face of your cube is ready.
- Follow the same 11th step on the remaining two “edge-V.”
- Your cube is ready!
Step 2: Make the Smaller Cube 18cm x 18cm
Repeat the steps above to make a smaller cube using 18cm x 18cm green paper.

Step 3: Crafting the Jumping Spring
Make a paper spring by folding the paper in accordion style. Make sure each fold is about half an inch wide.
To make sure it is a sturdy spring, either you take a little thicker paper, or multi-fold a thin paper, before folding it in accordion style.

Step 4: Adding paper spring to the small cube
Inside this smaller cube, insert the spring. That’s going to make your Frankenstein jump.

Step 5: Crafting our Frankenstein’s face
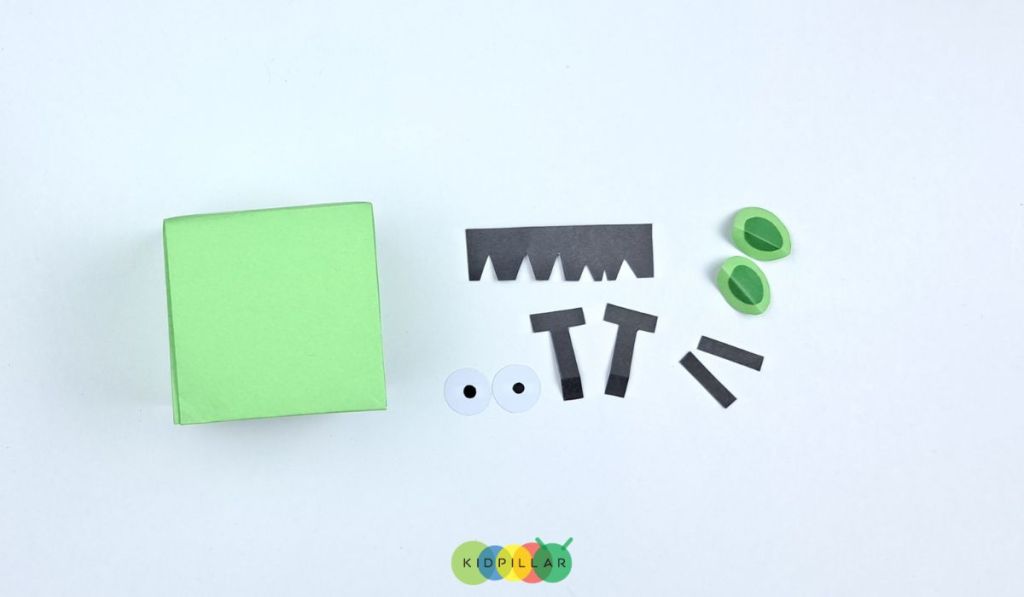
- Use a black sheet to create his hair and hands. Next, use black and white sheets to make his eyes!

- Light green and dark green to create his ears.

- Stick all these on the bigger cube and use a black marker to draw a smile and Frankenstein’s famous stitches.

Step 6: Making It Jump
Gently press down Frankenstein’s head and watch it wiggle wiggle!
Step 7: Show Off Your Creation
When you’re done, display your kid’s Jumping Frankenstein proudly at the Halloween party! That’s a must, it will encourage them.
Watch Frankenstein Paper Craft Video Tutorial Here
This is such a fun Frankenstein craft for students to make in classroom! And once they have learned how to make the paper cubes and the spring, they can use their creativity to make the face of their favourite monster.
And for those of you looking for moving crafts for young kids, try this Rocking Bat Craft! Super easy and quick to make, this adorable Halloween craft with add that glimmer into your little ones’ eyes!
Lastly, before you get started with your Frankenstein craft cum DIY Halloween Paper toy, here is a quick Halloween Would You Rather Question to get you thinking!
Have a spook-tacular Halloween!


